
Course Recorder Is Used for record Keeping.Record keeping is very important. It provides evidence of the courses steering by the ship, this evidence is vital if for some reason as enquiry is needed, for example after an accident.
Course Recorder: This is a graphic record keeping device which can record all gyro courses steered by the ship throughout the voyage. It has a built-in clock which keeps time accurately (on older ships this clock is a winding type but on modern ships it is usually electrical or quartz). This instrument is fitted on the ship’s bridge and is a legal requirement.
Need for a Course Recorder
- It is one of the most important sources of evidence regarding the courses steered by the ship in case of an accident like a collision or grounding.
- A minute to a minute record of course and time cannot be maintained manually as weather, yawing, and fluctuations in steering affect course steered. Hence the need to have an automatic recorder.
- It records the correct time of even small alterations.
- The recorded graph indicates whether the vessel is steering a steady course or if there is too much wandering either due to the weather or the compass itself. If it is due to the weather then adjustments can be made on the autopilot.
Two inputs are required for a Course Recorder to function
- The gyro compass repeater connected to the course recorder gives signals to control the spirally grooved drum, which moves the course and zone stylus.
- The clock connected to the paper feed roller controls the speed at which the paper is pulled under the stylus so the time graduations on the recording paper move at the correct speed.
Let us take a look at the Course Recorder paper
The course recorder paper looks like a graph paper with vertical graduations as the time scale and horizontal graduations as the course scale. It may either be a roll of paper or like a set of continuous joined sheets of paper like the perforated feed sheets of a printer. It has three sections:
- The time scale (the vertical scale) may be found either on the extreme right or left side of the paper (depends on the manufacturer). Usually, the graduations mark 10 minute intervals. This time scale is used to set the course recorder paper to show the correct UTC or GMT prior to starting.
- The course section which occupies the middle portion of the paper. This part is graduated for 90º as follows:
000 10 20 30 40………80 90
180 170 160 150 140…….100 90
180 190 200 210 220…….260 270
360 350 340 330 320… ..280 270
The scale is sufficiently magnified to be able to read the course steered to the nearest degree. For example, if the recorder shows a line on 320º, there should be some way of knowing if the course steered was 320º or 220º or 140º or 40º. This ambiguity is taken care of in the zone section.
- The zone section is found on the side opposite the time scale. So if the time scale is on the right-hand side of the paper then the zone section is found on the left-hand side and vice versa. This zone consists of four columns, each column corresponding to one quadrants 0-90, 90-180, 180-270 & 270-360.
Depending on which column the zone pen is in, the appropriate scale can be read on the course section.
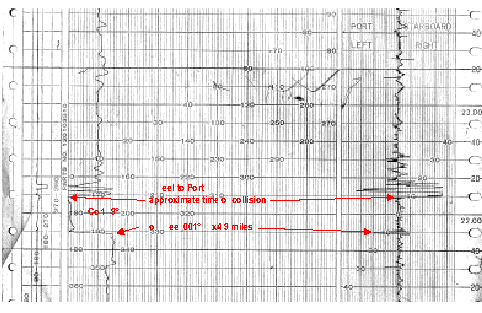
Here is a sample record of the course recorder. Four cases are illustrated.
- Case A: Referring first to the zone column, at the bottom and reading upward, the chart shows that the heading was in the first quadrant (0º – 90º) until 12:55 PM. It then swung into the second quadrant (90º – 180º). Sighting across the record at 12:50 PM and reading the first quadrant figures, the course is seen to be 74º. Again sighting across at 1:00 PM, the course is read in the second quadrant figures as 109º. (The course change from 74º to 109º is shown on the small diagram superimposed on the middle of the record.)
- Case B: Again referring first to the zone column, the heading is shown to start in the second quadrant, then to swing to the third quadrant for only a brief period, then back again to the second quadrant. Consequently, the initial course is read as 168º, and the final course as 159º. The re-entrant part of the plot is read in the third quadrant and shows the maximum point in the swing to be 182º.
- Case C: The zone column shows the initial heading to be in the fourth quadrant and therefore to be read as 342º. The final heading is in the first quadrant and consequently is 24º.
- Case D: The zone column indicated a swing from the second to the fourth quadrant. Therefore the initial heading was 172º and the final heading 277º. The gradual upward sweep of the trace indicates a slow but fairly constant change of the ship’s heading.
What other markings should you make on the course recorder paper?
- Before the start of the voyage, the date, time voyage commenced, the voyage number, and the port of departure.
- Every noon your position should be written on the paper.
- During port arrival and departure – the times of pilot boarding and departure times, thus keeping a record of pilotage time and courses steered.
- Any alterations of course at sea and the time of alterations. This will also give an indication if the course recorder clock is functioning well or not.
- Weather conditions, wind, state of the sea and swell whether head swell or beam swell may be recorded on the chart. Weather and rudder adjustments on the steering may also be recorded.
- The recorder clock should be checked for error against correct GMT and any error should be noted. In case the error is large, it should be corrected by adjusting the paper. If the error in the clock is very large and requires frequent adjustments – it is better to get the course recorder serviced by authorized technicians as frequent adjustment of the paper may give wrong recordings and this will not be acceptable.
The Stylus or the Recording Pen
The stylus may be of two types:
- Ink pens: This was found on the older course recorders. These pens had to be filled with slow drying ink once a week.
- Conducting wires: Modern course recorders are fitted with pens which are simply conducting wires which make a black mark on the chart paper touching the back metal plate. They contain no ink.
The course recorder usually has two pens one for the zone section and one for the course section. These pens are hinged so that they can be raised when changing the recording paper.
How the course recorder works
The operation of a course recorder is straightforward. Read this section and study the photograph then examine the course recorder on the bridge of your ship.
Refer to the figure (left) on the course recorder:
The drum consists of two sections; one with a continuous zig-zag groove cut in it going around the drum (B) and the other with a continuous stepped groove running around the drum (C). There is also a horizontal guide bar with a slit in it through which the pens are fitted and run.
The gyro signal (giving the ship’s heading) is amplified and fed into the servo motor (A). This signal rotates the servo motor and turns the drum in the direction indicated. The course pen moves along the zig-zag groove across the paper. In the figure, if the drum turns clockwise, the course pen will move to the left and vice versa. The zone pen will stay in its present groove (180 – 270) until the course has reached the junction. If the drum turns any more clockwise, the course pen will begin to move to the right and the zone pen will slip into the next zone (270 – 360).
The course being steered can be read by simply checking where the zone pen is (for example 180-270). Then we use that scale on the course section of the paper to read the course being steered as indicated by the course pen.
Changing Recording Paper
As mentioned earlier the recording paper could either be a paper roll or continuous feed sheets (depending on the manufacturer). Instructions on how to change the recording paper are given in the operation manual of the instrument.
Changing the paper on a typical course recorder is described here.
- Open the paper holders to both sides. Open the base plate toward the operator and place the recording paper in the chart receiving box.
- Let the paper pass between the rollers located on the side of the upper feed drum and let the paper pass over the upper feed drum from the rear to the front.
- Fit the holes of the two edges of the paper uniformly on the pins of the feed drum and be sure to attach the four lines which indicate quadrants so that they come on the left side. At this time both the course and zone pens should be raised.
After sufficiently pulling out the paper so that the feed drums turn smoothly, close the base plate. Insert the paper in the lower feed drum from the operator’s side toward the inner side. When the pins of the feed drum are in the holes of the recording paper, feed out the paper by slowly turning the chart adjusting gear toward the operator. When the recording paper on the base plate shows no slack, press the paper with the paper holders at the two sides. This completes the task.
Removing recording paper
When removing the recording paper, turn all switches to OFF; raise the pens. Slowly turn the chart adjusting gear toward the operator until the remaining recording paper is fed. Then, remove the recording paper.
- To remove a partially recorded recording paper, cut the paper. Turn the chart adjusting gear to feed out the paper and then take it out.
Starting and Stopping a Course Recorder
Different manufacturer’s stipulate different methods of starting and stopping their course recorders and these should be strictly followed. One method is given below:
- Attach a new roll of course recording paper, if necessary.
- Lower both the zone and course pen with the pen-raise knob.
- Ensure the time on the recording paper (where the course pen touches the paper) matches the correct GMT.
To match the two times – turn the power switch to OFF. Slowly turn the chart adjusting gear so that the recording paper comes to the right point, taking care not to let the recording paper slacken. Then, turn ON the power switch.
- To match the course pen and the Master compass:
- Turn OFF the repeater switch.
- Turn the indication tuning gear to bring the zone pen in the same quadrant as the ship’s course and, at the same time, match the course pen to the proper course on the recording paper.
- After completion of the above operations, ensure that the recording paper is properly set on the pins of the paper feed drums and that the drums rotate freely.
Switch on the power switch after adjusting the time and now the recorder is recording the courses steered.
Stopping the recorder:
- Turn off the repeater switch to stop the servo motor.
- Turn off the main power.
- Raise both the zone and course pens.
Care / Checks and Maintenance of the Course Recorder
The course recorder is an instrument that requires almost no maintenance. However, the manufacturer’s instructions should be followed. The following checks should be carried out when operating the course recorder:
- The course recorder should be checked every watch by the officer, to see that the pens are recording the correct course as compared to the master gyro and the recorder is keeping the correct time. If there is any error it should be reset as mentioned earlier otherwise the record obtained would be useless.
- When the ship passes any important landmark or alters course it should be recorded on the course recorder paper.
- A red line indicates the paper roll or feed sheets is close it the end. This shows either at the corner of the recorder paper or across the paper. When this is seen, a new roll of paper should be made ready for attaching to the recorder so that not much recording data is lost.
- When the ship arrives at a port, the recorder should be stopped and the clock should be switched off. The pens should be kept in raised position.
- Frequently check that the paper is fed to the recorder properly and is not getting damaged near the guide pin or at the rollers.
Off Course Alarm in General
- The off-course alarm normally is part of the autopilot unit.
- The alarm is provided to alert the watchkeeper if there is a deviation from the course set when the ship is being steered by the auto-pilot.
- It consists of an audible and visual alarm.
- A control is provided in the autopilot unit to set the maximum allowed heading deviation from the desired course before the off course alarm goes off. The setting span is normally from 2 degrees to 15 degrees.
- The maximum permissible deviation from the desired course should be decided to take into account the prevailing weather, proximity of navigational hazards and traffic conditions.
- There should be a routine to test the off course alarm daily while at sea. In addition, this should be tested prior departure from a port.
- Some ships may also have a magnetic off course alarm.
Please note:
When the ship is fitted with an off course alarm for the magnetic compass, care should be taken to adjust this after every course alteration as the error on the magnetic compass may vary from course to course. Also, it should be noted that magnetic compasses tend to sway quite a bit with the ship’s movement and this has to be allowed for when setting the span. Weather condition also has to be taken into account.
It is the primary responsibility of the duty officer to check that the off course alarm is set properly. Any off course alarm heard should not be treated lightly by silencing the alarm. The cause should be thoroughly investigated – all courses checked, errors of the compass taken, a position of the vessel plotted to ensure that all is well.
Any false alarm should be immediately brought to the notice of the master and any fault rectified.
UNDER NO CIRCUMSTANCES SHOULD THIS ALARM BE SILENCED OR KEPT OFF.


Thank you for your feedback we will update soon.
Sir picture is not visible although data is sufficent but figure us also required which will explain it very well.